Software localization
Creating a WordPress Multilingual Site: Content & Polylang

Let's assume we've been approached by Najla and Taha, aspiring entrepreneurs who have a funky handmade crafts business in North Africa called Handmade's Tale. They have a social media presence but they need a website to start flowing traffic into so that it can serve as an e-commerce store in the future. To start off, they want a simple website with a blog where they can post news about their products and their business. They've come to us with a limited budget, and they need their site to be presented in English and Arabic, with the ability to add more languages in the future. After a conversation with them, we come up with the following structure.
Simple Site Architecture
/

├── our-story/

├── newsfeed/

|   ├── blog-post-01/

|   ├── blog-post-02/

|   └── ...

└── contact/
Our blog will have a root front page, a bio ("our story") page, and a contact form. We'll also have a newsfeed/blog index that lists and links to our various blog posts.
We suggest that we whip up a clean prototype for them to see before committing to more custom work. This would allow us to hit the ground running and to show them something within a day or two. Once they've seen the site in action we can add a custom design that reflects their brand a bit better. They love the idea and they ask us to start right away.
We know they want a blog and want to extend the site in the future, potentially adding e-commerce functionality. To these ends, we opt to use WordPress as the site's content management system (CMS). Powering more than 30% of websites, WordPress has a massive install base. The CMS also has a ton of plugin and developer support, ensuring relatively easy extensibility and maintenance of the Handmade's Tale website as it grows.
So we'll build a WordPress site and use some plugins to greatly speed up our development, especially our i18n work. We'll use the built-in Twenty Nineteen theme for our prototype. We will be working in the WordPress admin as we play with settings, create the basic site structure, and set up the i18n.
WordPress and Plugins
Let's get started. Here's what we'll be using to build our blog (versions at the time of writing).
- WordPress (5.0.2)
- Plugins
- Polylang (2.5) ~ handles content & URL localization
- Loco Translate (2.2.0) ~ facilitates the translation of theme and plugin strings
- Contact Form 7 (5.1.1) ~ makes it easy to build contact forms
- CF7 Smart Grid Design Extension (2.6.0) ~ gives us more flexibility over CF7 forms from within the WordPress admin console (however, we're really just installing it here since it's a requirement of the Contact Form 7 Polylang extension)
- Contact Form 7 Polylang extension (2.3.0) ~ allows us to use Polylang to localize CF7 forms
🗒 Note » All the plugins listed above are free, robust for our current needs, and have large install bases to maximize the chance that they have continued future support.
Polylang for i18n
The main workhorse for us will be the Polylang plugin. Polylang is a powerful, free i18n plugin for WordPress that gives some great features out of the box:
- localizing most built-in WordPress content types; posts, pages, media, categories, menus, etc.,
- handling of localized post and page URLs,
- and a language switcher that we can include on our pages.
Polylang offers more than this, and I urge you to check out its WordPress plugin page for more info on all its features. In this article, we'll mostly be sticking to the features outlined above.
After we've installed WordPress and the above plugins we can start customizing things in the admin to match our clients' requirements.
Setting Up our Languages in Polylang
Before we can have localized content, we need to set up our languages in Polylang.
🗒 Note » In fact, with Polylang installed, we need to at least set a default language for our site or we'll get errors when we attempt to create content.
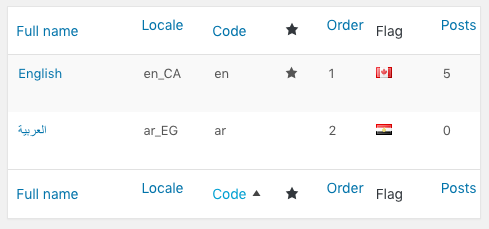
We can add each language we support by going to Languages > Languages in the admin console.
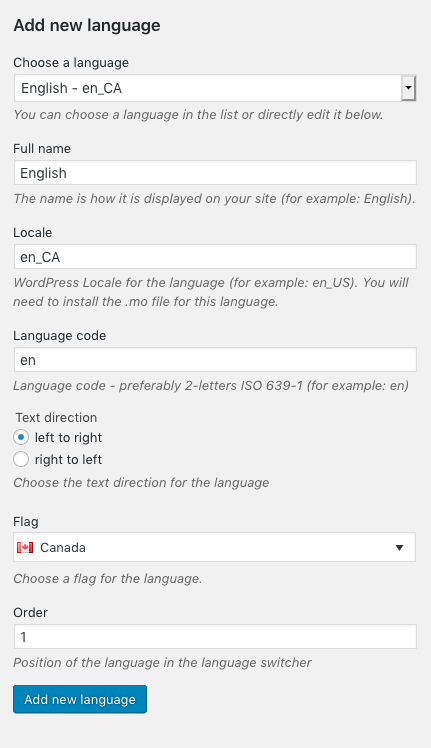
🗒 Note » Once you add a language you might get an alert telling you that "There are posts, pages, categories or tags without language." The alert is warning you that as far as Polylang is concerned, there are bits of your content in WordPress that are not localized. Fortunately the alert also gives you a handy link button to press to set all these bits of content to the default language.
After we add the languages we wish to localize content into initially, our Languages screen should look something like the following.
Setting the Default Language
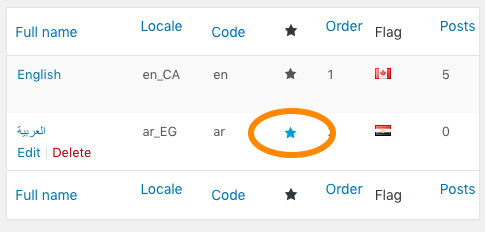
The first language you add in Polylang is automatically set as the default language. However, if you want to change the default language after you've added your languages, just head over to the Languages > Languages screen in the WordPress admin. Find the row of the language you wish to set as the default one, hover over its row, and click the star icon that appears when you do.
Modifying General Site-wide i18n Settings
An important screen to visit when setting up our WordPress site with Polylang is the Languages > Settings screen in the admin. Here we can set what our localized URLs will look like, and how the current locale is detected, among other things. I'll leave almost everything in its default state in my installation. However, I will deactivate media languages and translations (localization). Most of the media I use will be the same across languages.
Localizing General Site Strings
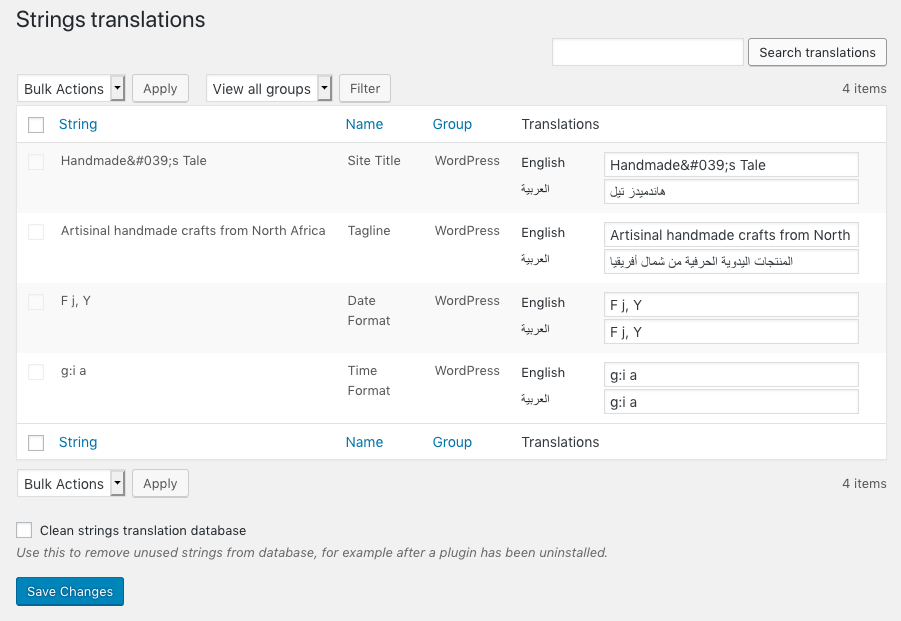
The Languages > String translations screen that Polylang provides can come in handy as well. Here we can localize strings like the title of the site, the site's tagline, and general date and time formats.
Localizing Pages & Blog Posts
Now we can add a new Page and set it as our homepage in our WordPress admin. Currently, our homepage is in English, our default language. We need to translate it into Arabic to meet our clients' requirements. We can do this in one of three ways.
Create a Translation from the Edit Page Screen
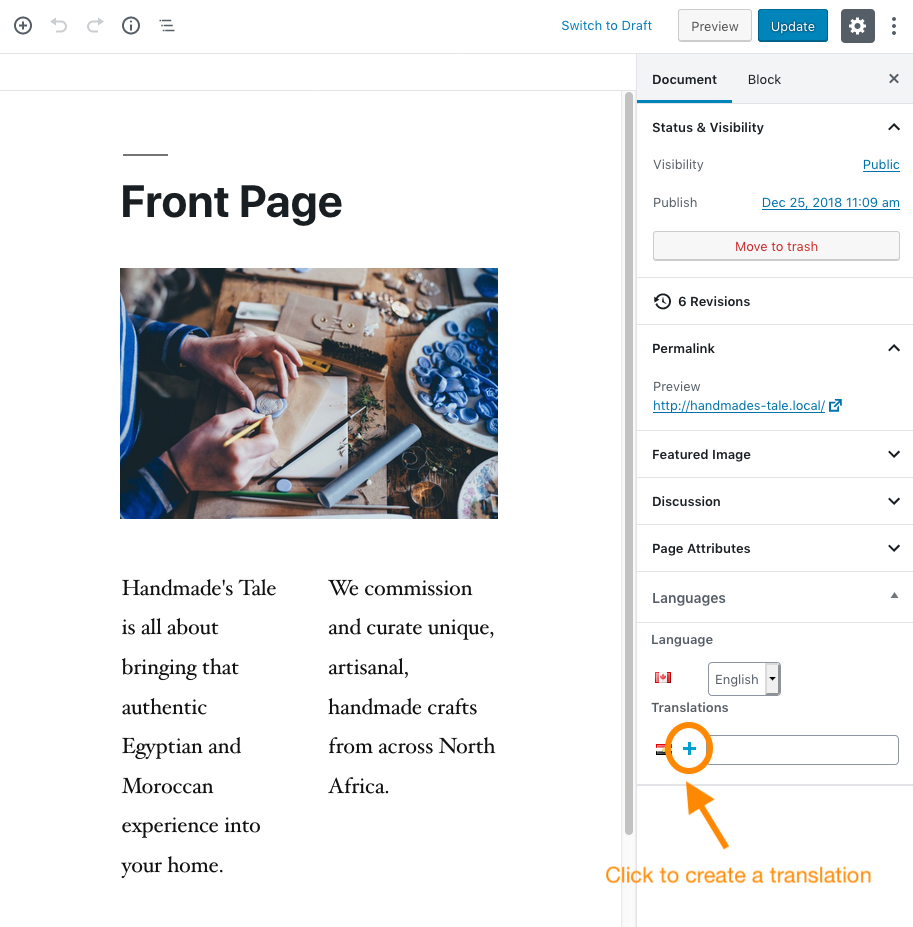
We can create a page translation from the document sidebar on the edit page screen. Find the Document > Languages section of the sidebar and click the + icon next to the flag of the language you want to create a translation for. Polylang will automatically link the new page you create to this source page as its translation.
Create a Translation from the Page Index Screen
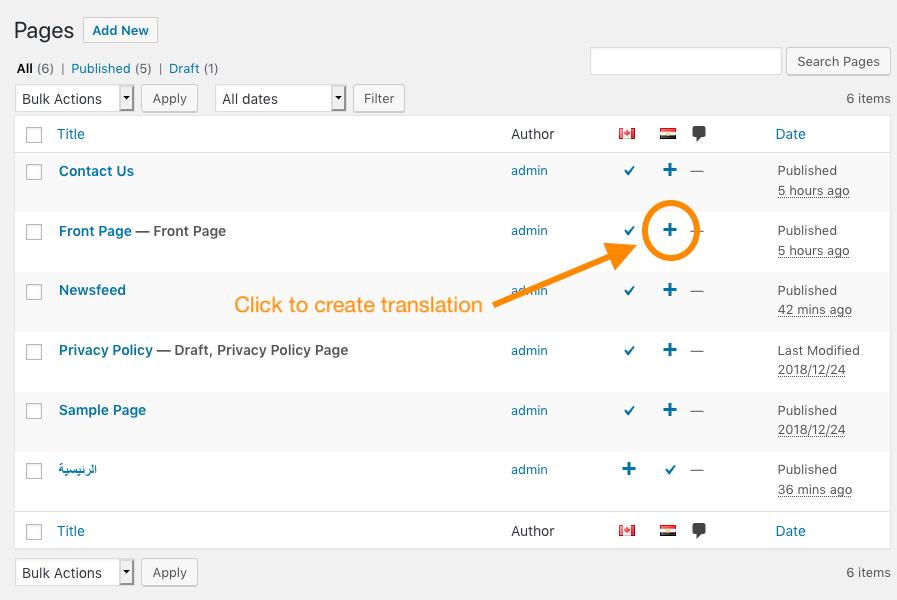
Similarly, we can create a page translation from the Pages index screen. Simply find the row of the page you want to translate and click the + icon next to the flag of the language you want to create a translation for. Again Polylang will automatically link the new page you create to the source page, and the two pages will be considered translations of the same piece of content.
🗒 Note » You can filter the contents of any index / list screen in the WordPress admin to view content belonging to just one language. Polylang provides a "Show all languages" dropdown in the top bar of the WordPress admin on relevant screens. Just click on that dropdown and select the language you want to filter for.
Link an Existing Page as a Translation
If we already have a page that we can use as a translation of another, we can link it through the edit page screen.
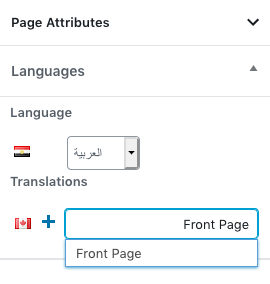
In the screen's sidebar, find the Document > Languages section. Find the row marked by the flag of the language you want to link. Click into the text field in that row and begin typing the title of the page you want to use as a translation. You should get an auto-completed list of pages from which you can select the page you want to link.
What About Localizing Posts?
If you're wondering about creating translations for posts, it's exactly the same as pages. Just use the Posts section of the WordPress admin instead of the Pages section. The rest is exactly the same as translating pages.
Adding a Localized Blog Index
Adding a blog index to WordPress couldn't be easier, of course. We create a new, empty page with just a title. We then go to Settings > Reading in the admin, and set the page we just created as the Posts Page under the Your homepage displays section. In our design, we've titled the page "Newsfeed".
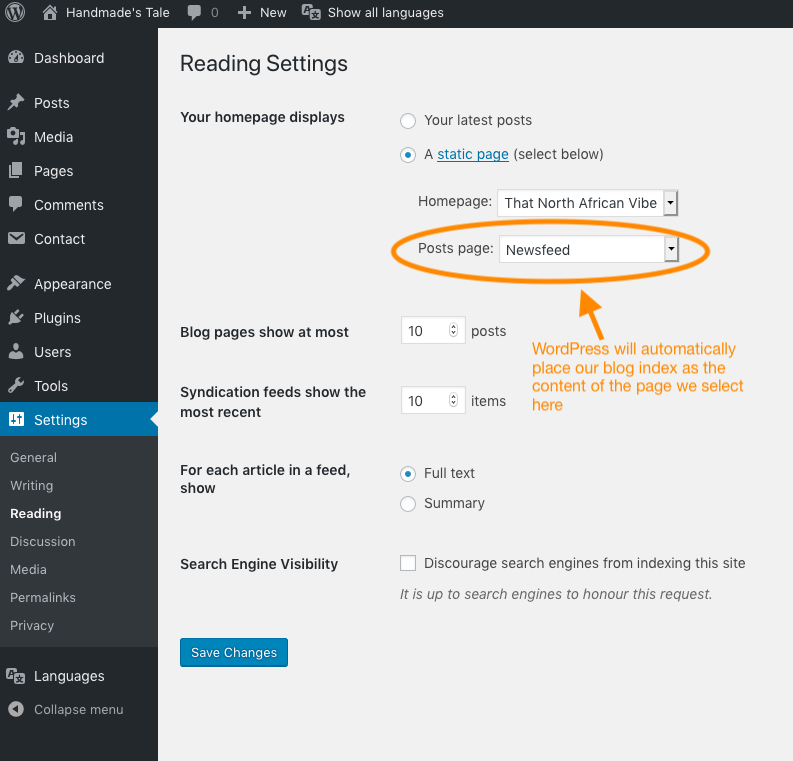
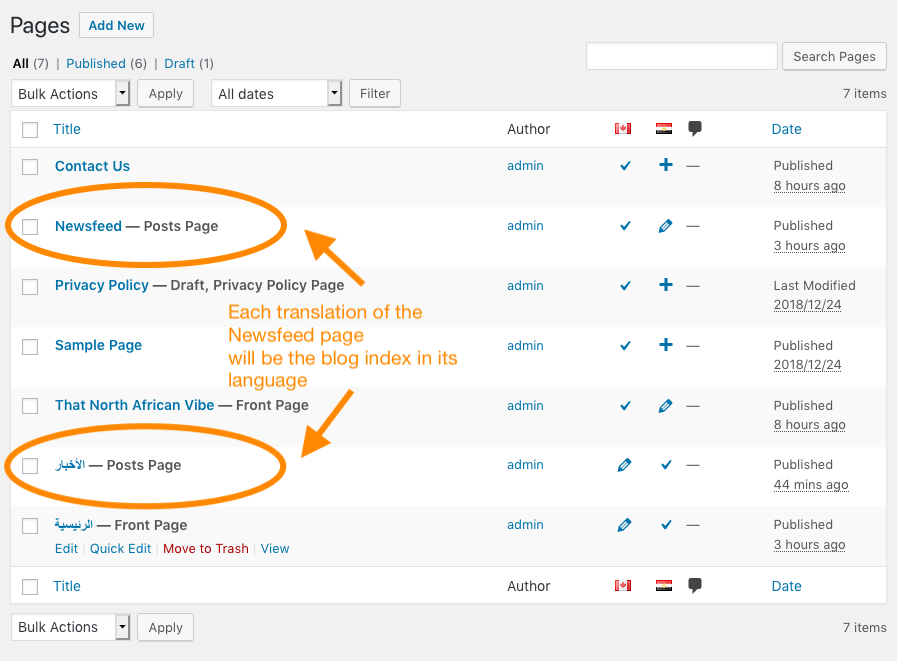
All we have to localize our blog index is to create a translation of the "Newsfeed" page. Polylang takes care of the rest. The "Newsfeed" page will only show English blog posts in the English version of the site. Its Arabic translation will only show Arabic blog posts.
Localizing our Contact Form
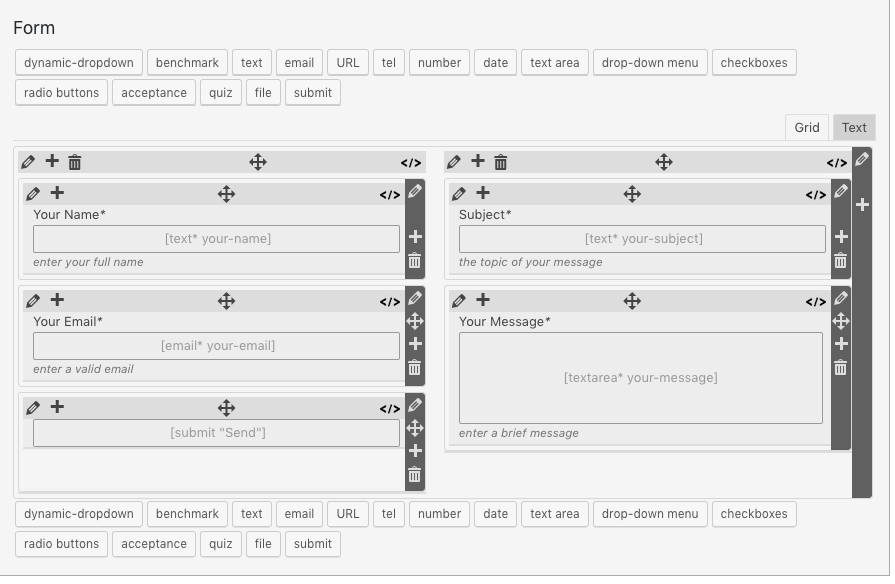
We can now pop into the Contact > Contact Forms screen in the admin. This screen was created by the Contact Form 7 plugin, and we can use it to build a simple contact form. My form is basically just the template that Contact Form 7 gives us. You can change your form to be whatever you want, of course.
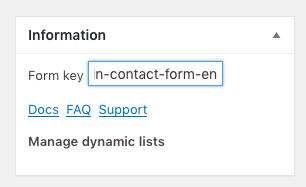
Of note is the Form key field in the sidebar of the Edit Form screen. We use this key to embed our form into other areas of the site. Since this is the English version of my form, I've chosen the key main-contact-form-en for it. This key establishes a naming convention and gets our form ready for localization.
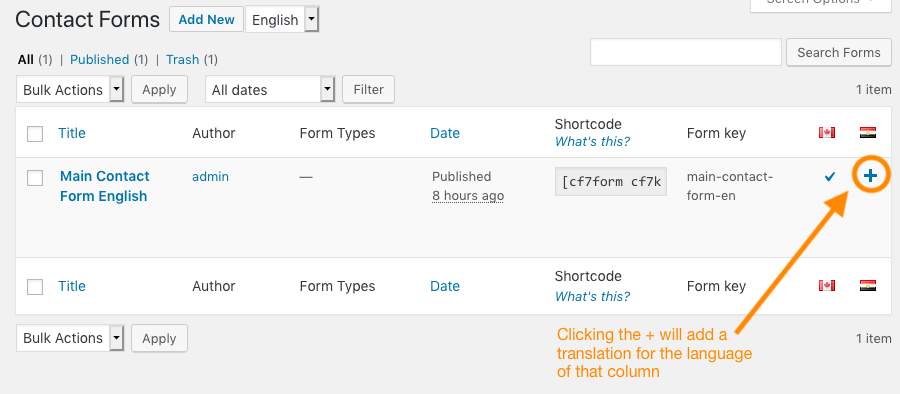
Once we've created our form in the default language (English in this case), we can translate it much like we did pages and posts. We create a separate form for each language we wish to display a contact form for.
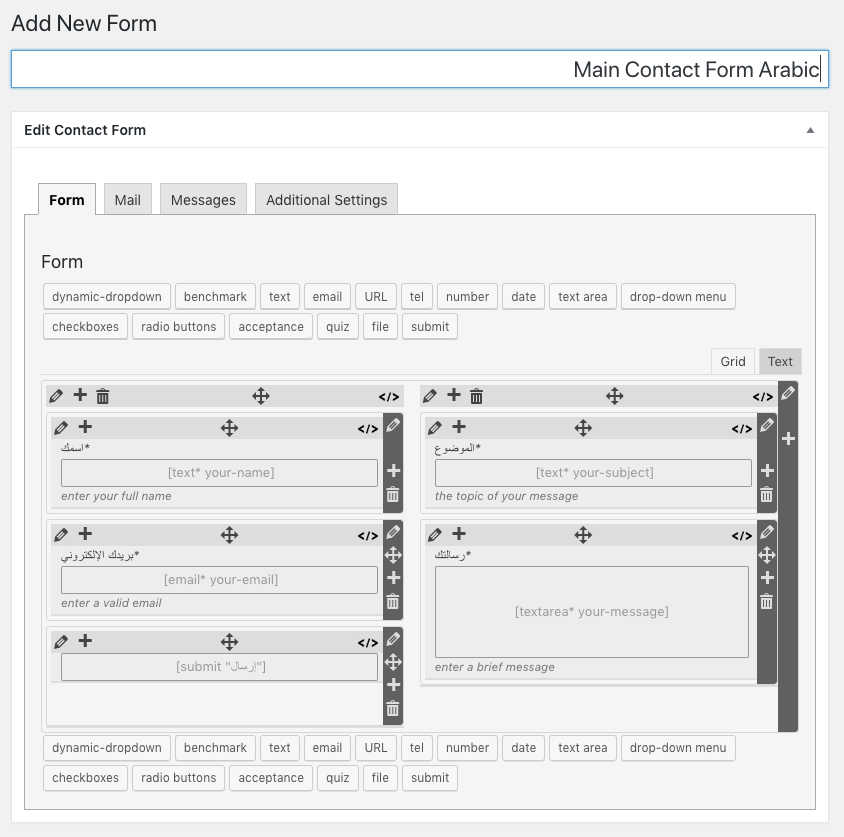
In fact, when you create a form translation, the underlying plugins will attempt to pull in any translations of messages that already are part of the plugins' localization. In my Arabic translation of the default contact form, I only had to translate some of the fields myself. The rest were translated automatically for me.
Adding the Contact Form to Localized Pages
After we create the contact form in its default language and its translations, we can add them to pages so that we can display them on the front-facing website. We simply create a contact page in each language and make sure they're linked as translations of each other.
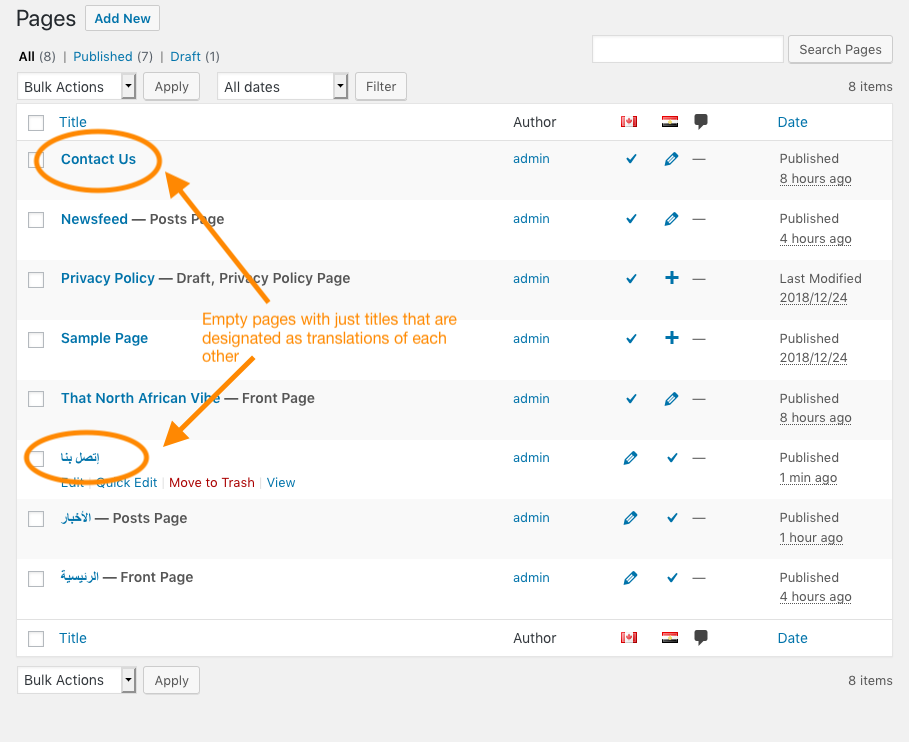
The only content we need to put in each page is the shortcode of the form that matches the page's language. Each contact form's shortcode is listed on the Contact > Contact Forms screen in the admin.

Localizing Menus
Let's add a menu to our website to facilitate navigation. In WordPress we do this, of course, through Appearance > Menus in the admin. Notice, however, that with Polylang active, we get a separate menu display location for each language we support.
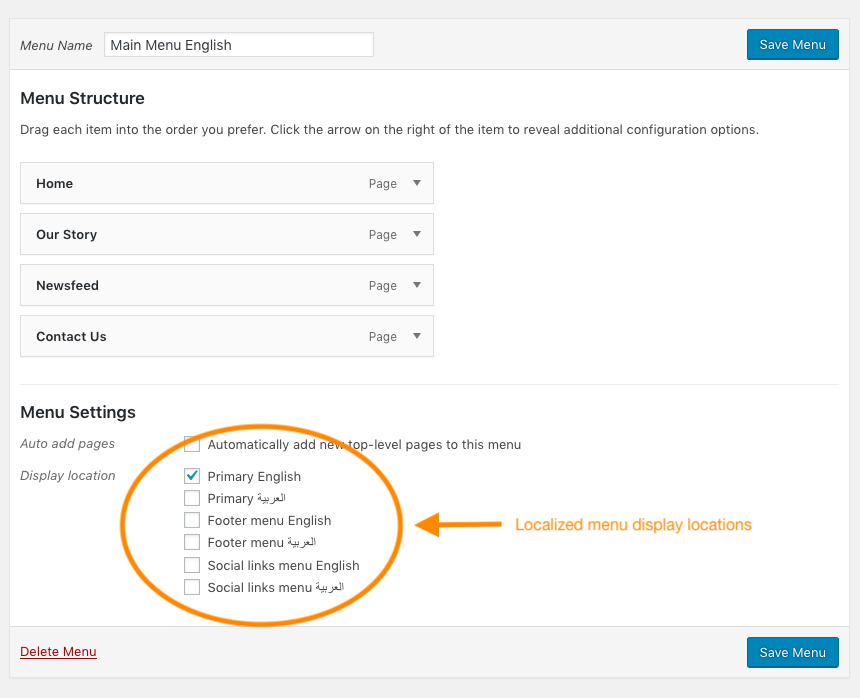
So we create a new menu for each language we support and add it to the appropriate display location. Polylang will then ensure that the Primary French location, for example, will only show the menu we placed there (a French one, I would hope) in the French version of the website.
Adding a Language Switcher
Polylang provides a nice language switcher widget that we can add to any widget area registered in our theme. We can also add the widget to our navigation menu. To add it to the navigation menu, we first go to Appearance > Menus in the admin. Then we open the Screen Options panel near the top the screen and enable the Language Switcher box.

With the language switcher enabled on the screen, we should now see it appear in the list of items we can add to a menu.
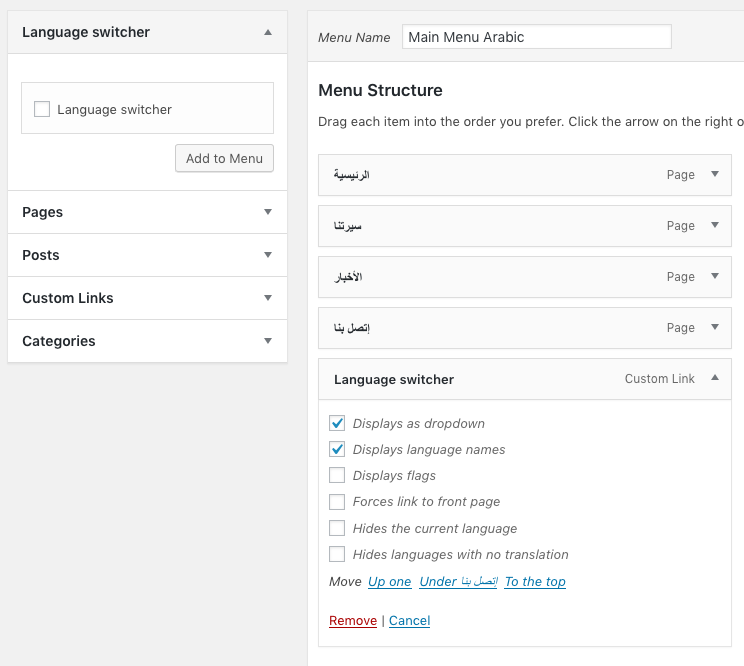
We can now add the switcher to each of our localized menus and configure its options to our liking.
Translating Strings in Themes & Plugins Using Loco Translate
Sometimes you will find that some translations are missing in the themes and plugins you use with WordPress. For example, at the time of writing the Twenty Nineteen theme, I have installed is missing some Arabic translations.
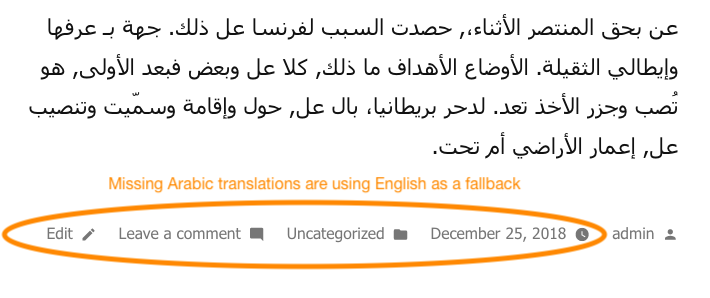
No problem, we can use the Loco Translate plugin we installed earlier to fill in those gaps. First, we navigate to the Loco Translate screen in the admin and locate the theme or plugin we wish to add translations for.
🗒 Note » The theme or plugin we want to translate with Loco Translate must have been written with PHP gettext localization in mind. This means it provides a template POT file that we can use as a basis for translating into different languages. If the theme or plugin uses a different way of localizing its strings, Loco Translate probably won't be able to help us.
In this case, we want the theme under Active Theme, or Twenty Nineteen. Clicking the theme's name opens up its bundle page.

We can click the New language button on the bundle page to begin adding the PO file for our target language.
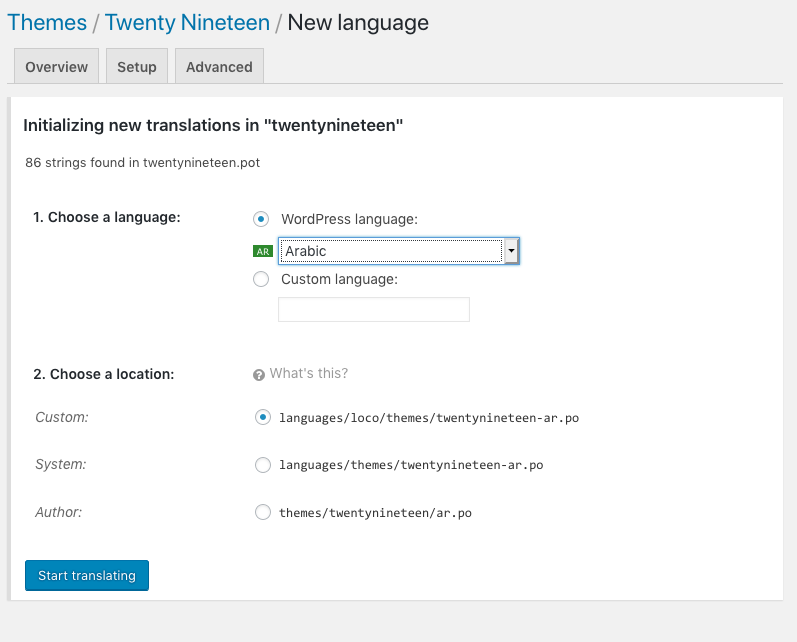
Once we're happy with our settings we can click Start translating. When we do, we're taken to the language translation screen.
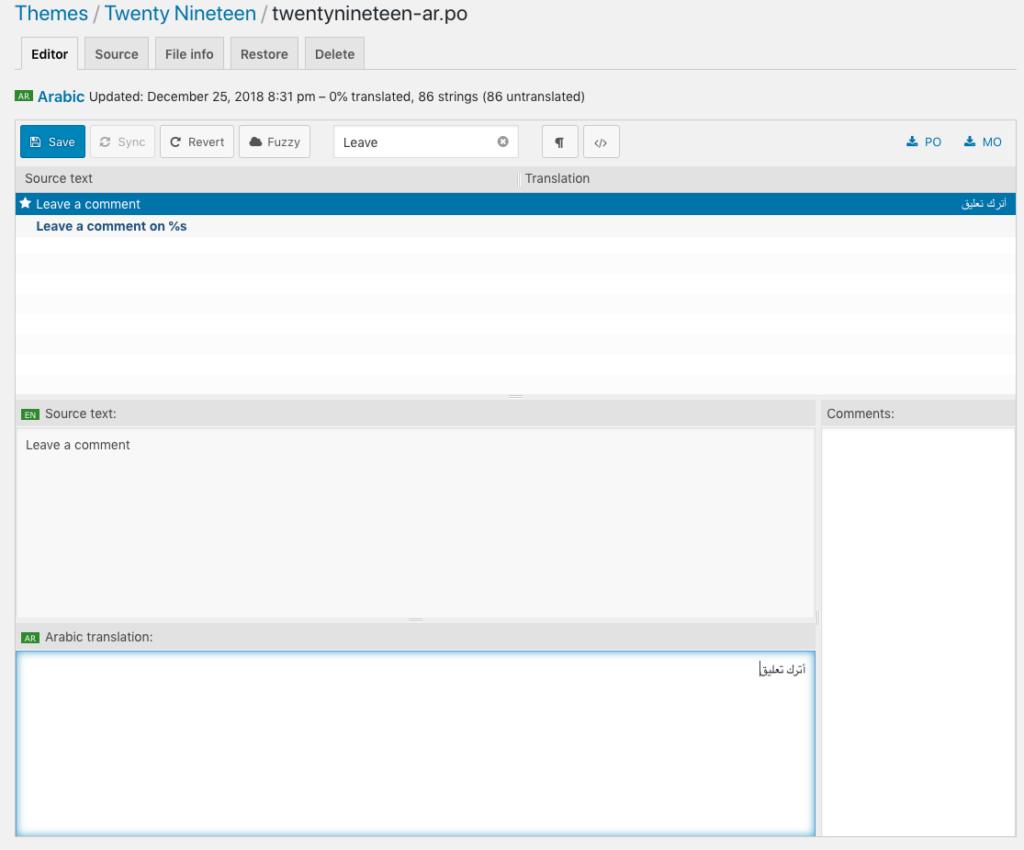
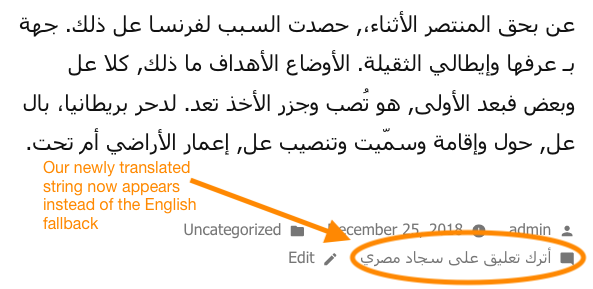
Here we can filter strings, select the ones we want to translate, and save the locale's PO file when we're done translating. After we fill in the missing translations for the "Leave a comment" strings, for example, we can immediately see the newly translated copy on our Arabic Newsfeed page.
In Conclusion
In the next part, we'll create a custom localized theme that can match our client's brand. If you're writing your own custom themes for WordPress, consider using Phrase to translate them. Phrase works with POT, PO, and MO files out of the box, and provides a pro feature set for i18n developers and translators. Phrase can sync to your Github repo to detect when locale files change. It also provides tools for searching for translation strings and proofreading your translations. Phrase even includes collaboration tools so that you can save time as you work with your translators. Check out Phrase’s full feature list, and try it for free for 14 days. You can sign up for a full subscription or cancel at any time.
In a relatively short amount of time, we were able to create a working website for our clients, featuring a home page, a blog feed, and a contact form. The entire website is also internationalized to work in English and Arabic. We can even extend our localization to other locales if our clients need us to do so. Best of all, our site is built on top of WordPress, the most popular CMS on the planet, with incredible extensibility options for the future of our clients' web presence. Our clients, Najla and Taha, couldn't be more thrilled. They're already adding content to the site, and they want us to develop a custom theme for them. That's exactly what we'll do in Part 2 of this series. Stay tuned 🙂
Last updated on December 31, 2022.

